

Think Your Ad Strategy Still Works in 2023?
Get the most comprehensive guide to building the exact workflow we use to drive kickass ROAS for our customers.


In this article, we will dive deep into the Meta (formerly Facebook) pixel and its tracking capabilities such as standard events, custom events, and a whole lot more.
So, if you want to figure out how to optimize conversions with Meta pixel standard events and custom conversions, then stick around until the end.
We are about to discuss everything from how to create a Meta pixel event to Meta pixel optimization and everything in between.
The Meta (formerly Facebook) Pixel is a snippet of code that connects your website or landing page to Facebook and records necessary analytics.
It pulls out useful data from your website or landing page to track user behavior and plan the best course of action. It monitors and measures the efficacy of your ad campaigns based on the Facebook events that you set up.
While this tool provides advertisers with useful insights about user behavior, it also enables Facebook to collect the necessary data in order to optimize your ad campaign.
Although you can track almost any data on your website with the Meta pixel, you don’t have to track all of it. In the world of analytics, less is more, and therefore, you only need to track information that helps you measure the performance of your campaigns.
You can do that based on specific parameters that are called Meta pixel events. These are triggers that fire up the Pixel when a website visitor takes a particular action.
There are three main types of pixel events that you can set up: standard events, custom conversions, and custom events.
Standard events are predefined triggers, while custom conversions let you tell Facebook how much a conversion is worth for you and distinguish between different conversions.
Meta pixel custom events are a more advanced level of customization. These events are necessary when you have essential stages in your funnel that the standard Meta pixel events do not cover.
Based on the events you track, the Meta pixel provides you with actionable data that enables you to optimize your ads by showing it to those who are most likely to take the desired action. You can then create segmented audiences and even set up automatic or manual bidding to reach out to them and drive more conversions.
Now that you know how important Meta pixel is and already installed it on your website, we can move on.
As mentioned earlier, Meta pixel standard events are predefined triggers that are available for immediate use.
These are common metrics used by most advertisers and are readily available for set-up. You can set them up manually or using the Event Setup Tool.
Let us now discuss each of the Meta pixel standard events available.
The Add Payment Info Meta pixel event indicates that the customer has added payment information prior to the checkout process. That could be adding a credit card or other payment-related information.
Standard event code: fbq('track', 'AddPaymentInfo');
This Meta pixel event lets you track those who view a specific page that matters to your business. It could be a product page or any kind of landing page for example.
However, this Meta pixel function only indicates that a user has visited the specified URL. It does not necessarily mean that the user viewed the content on that URL.
Standard event code: fbq('track', 'ViewContent');
When a visitor adds a product to the cart or basket, this event is triggered. So, you can use this event for retargeting people even if they did not complete the purchase.
Standard event code: fbq('track', 'AddToCart');

When somebody adds a product to their Wishlist, it is evident that they are interested in that product.
Taking note of this allows you to give these people that gentle nudge which they require to move the product to their cart and complete the purchase.
Standard event code: fbq('track', 'AddToWishlist');
When you offer a lead magnet or any other service that requires the visitor to complete registration, you can set up this Meta pixel event.
This way, if you want to know how many people signed up for your newsletter through a particular campaign, you can track that and use the data to reach out to them with a discount offer later on.
Standard event code: fbq('track', 'CompleteRegistration');
When any type of contact via phone, text message, email, chat, or any other means is established online between you and your customer, the Contact Meta pixel event allows you to take note of it.
Standard event code: fbq('track', 'Contact');
When your products are customized through an application, tool, or digital technology owned by your business, this Meta pixel standard event can be triggered.
Standard event code: fbq('track', 'CustomizeProduct');
This event is made for organizations that raise funds for a particular cause. It is triggered when someone donates funds to you or your organization.
Standard event code: fbq('track', 'Donate');
This Meta pixel event relates to actions taken to locate you or one of your branches, in order to interact with your business. The intention could be visiting your store or looking for a certain product across your various store locations.
Standard event code: fbq('track', 'FindLocation');
When a visitor selects a product or a service, adds it to the cart, and clicks on the checkout button intending to make a purchase, the Initiate Checkout Meta pixel event triggers.
Standard event code: fbq('track', 'InitiateCheckout');
When a visitor submits personal contact information such as an email address or a contact number with permission to contact them later, you can track and retarget them. This could be in exchange for a free e-book or some other lead magnet.
Standard event code: fbq('track', 'Lead');
This is when someone completes a purchase, and you want to segment them and reach out to them with yet another product recommendation.
This event should trigger when the payment is completed, and the receipt is generated. This event can be set to fire when the customer views the "Thank You" page after they purchase.

You can also exclude these people from campaigns so you won’t ask them to purchase something they already did.
Standard event code: fbq('track', 'Purchase', {value: 0.00, currency: 'USD'});
This Meta pixel standard event is triggered when someone makes a booking or a reservation to visit one of your business locations.
Standard event code: fbq('track', 'Schedule');
The Meta pixel Search event refers to searches that are performed on your website, app, or other digital property.
Standard event code: fbq('track', 'Search');
This Meta pixel event is triggered whenever someone starts a free trial of some product or service that you offer.
Standard event code: fbq('track', 'StartTrial', {value: '0.00', currency: 'USD', predicted_ltv: '0.00'});
When someone applies for a product, a service, or an event like a webinar, then this event is triggered.
Standard event code: fbq('track', 'SubmitApplication');
This Meta pixel event collects data pertaining to those who started a paid subscription to one or more of your products or services. It is extremely useful when you want to sell renewal plans or to upsell.
Standard event code: fbq('track', 'Subscribe', {value: '0.00', currency: 'USD', predicted_ltv: '0.00'});
1. Go to the Facebook Events Manager.
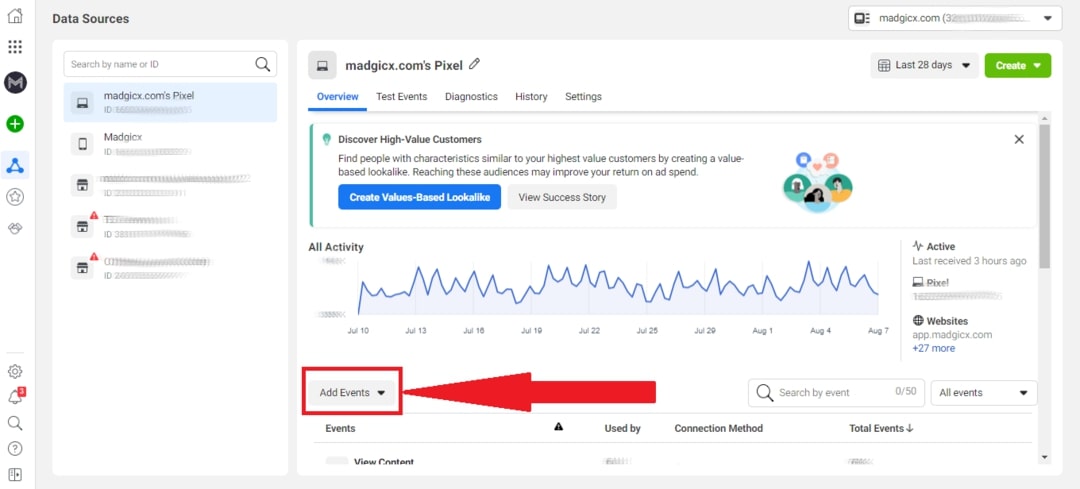
2. Under the “Overview” tab, click “Add Events”. Alternatively, you can tap into the “Settings” tab, scroll down to “Event Setup”, and click “Open Event Setup Tool”.
3. Select “From the Pixel" and then click “Open Event Setup Tool”.
4. Enter your website’s URL and click “Open Website”. Make sure you write the full URL with HTTP(s) in the beginning.

5. The Event Setup Tool should open up on your website. If it doesn’t, try turning off your adblocker.
6. Now you can go through each page on your website and add button click or URL tracking. You can also view the details of your existing events, edit, or delete them.

7. You can also tap into the “All Events” tab to view, edit, or delete events you set up on other pages on your website. Note that if you set up an event manually in your website code, you won’t be able to view its details, edit, or delete it using the Event Setup Tool.

8. Once you’re finished, you can either click “Finish Setup," or go back to the Events Manager and click “Disconnect."
Now that you know what Meta pixel events are, it's time for you to select the ones that are best suited for your business.
Meta pixel optimization depends a lot on your business type and model.
The end goal of all eCommerce campaigns is to generate more sales and so, you must use Meta pixel events that help you identify and reach out to audiences that are most likely to convert.
Let us now discuss some Meta pixel events and why you must use them to optimize your advertising.
First of all, a typical eCommerce marketing funnel would look like that:

In each stage of the funnel, there are different events you should track.
This is the top-of-the-funnel event on your website. It shows that the visitor has an interest in your product, but it’s a relatively low-intent event.
You’d like to set your pixel to register this event when a user views your homepage or a product page. If you have category pages, you can set this event for them as well.
You should set this event to fire when the relevant page loads since you want to know that the visitor really viewed the content on the page (even though it doesn’t guarantee they read it).
Adding a product to a wishlist indicates a strong purchase intent. Therefore, retargeting this segment of your website visitors can turn out to be highly profitable. Particularly, when you need to push your slow-moving inventories.
Afterward, you can use dynamic product ads, for example, to show these people the exact item they added to their wishlist but didn’t purchase.
This event should be tracked when a visitor clicks the “Add to Wishlist” button, as clicking the button already shows the intention you’re interested in.
When someone adds a product to their cart, then it is quite evident that the person intended to buy the product. This shows an even higher intent than Add to Wishlist.
However, sometimes the visitor doesn’t complete the purchase due to some interruption. In this case, you need to reach out and show your ad to such potential buyers before they forget about your product or service.
Dynamic product ads can work great for this audience as well.
This event should also be tracked when the visitor clicks the “Add to Cart” button.
This is another event that shows the user had an intention to purchase, but they might have been interrupted before completing the process.
You should set the pixel to fire this event when a visitor clicks the “Initiate Checkout” button.
When someone adds payment information such as billing info to their account, then you can be sure that they intend to make a purchase.
This is a big step towards completing the purchase, and it shows a much higher intent than the above events.
The Add Payment Info Meta pixel event can be tracked either when a visitor clicks a “Save Payment Info” button or when the next page in the process loads (such as a “Review Your Order” page).
This is your bottom line, and it’s a super-important event to track.
You may want to use this event when you are selling ancillary products or services to your existing customers. For example, if you sell mattresses, you may want to retarget those audiences by showing up an ad for bed linen.
You can also exclude people who already made a purchase from your retargeting campaigns that are meant to drive more sales. You don’t want to piss anyone off by showing them an ad calling to an action they already carried out.
Another use of the Purchase event would be for creating a lookalike audience based on your existing customers. This kind of lookalike audience is one of the most powerful and profitable acquisition audiences.
Track this event when your “Thank You” or purchase confirmation page loads, or in case you don’t have such a page - when the customer clicks the “Purchase” button.
If you're planning a Black Friday/Cyber Monday campaign (or any other big sale), you should check out our guide.
When you generate leads for a business (whether it’s yours or your partner’s business), you need to think like a potential buyer.
The typical lead-generation funnel would usually be:

Depending on your business model, you can choose to track different Meta pixel events:
This would be the visitor’s first step on your website, and you should set this event to fire when your landing page loads.
Use this Meta pixel standard event to reach out to those who have already furnished their contact details and wish to be contacted by you.
This should be tracked once the visitor leaves contact information and clicks “Submit”.
When someone completes registration/submits an application for a product or a service you offer, you can segment and retarget them with this Meta pixel event.
The difference between completing a registration and submitting an application depends more on how you introduce your offer, which is actually your lead magnet. Choose the more suitable one to make it easier for Facebook to help you optimize for conversion.
So, if you sell online courses, for example, this event can be of great help, as you can, later on, upsell or offer these people more courses or other services.
This event would also fire once the visitor clicks the “Submit” button.
This event would fit best in case you provide a paid subscription for your service or product.
In the case of Lead Generation, this is a bit like Purchase for eCommerce: You can retarget these people in order to upsell, exclude them when promoting the subscription, and use them to create lookalike audiences.
If you have a SaaS a B2B service company, your funnel can usually be described as follows:

Content pages include your blog articles and any educational or informative content you have on your website.
Structural pages include pages such as “About Us” and pricing pages.
The events you should be tracking will be dictated by your business model:
You’d like to register this event on page load on every important page on your website: Your Homepage, Product Pages, Blog Page, Blog Articles, Sign-Up Page, etc.
Of course, you need to segment your visitors by the different pages they viewed. This can be done by creating URL-based custom conversions. More about that shortly.
In case you provide a free trial for your software/service, you should set up this event to track everyone who starts this trial.
You can use both events interchangeably in this case.
You’d like this event to fire when the “Thank You”/”Complete Sign-Up” Page loads. In case you don’t have such a page, you can set up the pixel to fire when the visitor clicks the “Complete Sign-Up” Button.
If you only provide a paid subscription, you would like to know when a website visitor added payment info, even if they didn’t complete the sign-up process.
This event should fire when the visitor clicks “Save” after adding their payment info, or on when the next page in the process loads.
If you only provide a paid subscription, this would be your bottom-line event, just like in an eCommerce business.
You can use both events interchangeably in this case.
This event should fire once the customer clicks “Complete Sign-Up” or on page load if you have a “Thank you”/sign-up confirmation page.
A good example of using this event would be if you have a newsletter and you want to retarget people who signed up for it.
You can track this event when the “Thank You” page loads or when the visitor clicks “Register”/”Subscribe”.
Your main goal would be that people install your app. This is why your funnel would usually look as follows:

And the events you should track would be:
You’d like this event to fire when your homepage loads.
You’d like this event to fire when the visitor clicks the “Download” button.
If you provide a free trial of your app, you would like to track this event once your potential customer clicks “Download."
You should track these people and target them with ads convincing them to upgrade to the paid version of your app.
You may also like to contact them in order to close the deal.
Although Meta pixel standard events cover up most of the event triggers you can think of, different events may have a different value for your business. You may also want to distinguish between specific events in order to create segmented custom audiences in the future.
Therefore, Facebook provides you with the flexibility to set up custom conversions by adding parameters to standard conversions.
Now, this is precisely where custom conversions come in and allow the advertiser to make the most out of their ad campaigns.
To set up custom conversions, follow this step-by-step guide:


However, you need to bear in mind that if you choose “All URL Traffic” as the conversion event, then you will not be able to create rules based on event parameters.
Also, it is worth taking note that you can set up parameters on both standard events and custom events.
For better clarity, let us now understand custom conversions with a couple of hypothetical situations.
Let us assume that you have an eCommerce business that sells products for different pets, such as dogs, cats, fish, and birds.
When creating future campaigns, you’d like to retarget people with ads offering the products that are most relevant for them. Therefore, you’d like to distinguish between people who have fish at home and bird owners, for example.
That is very easy to do with custom conversions: Just create URL-based rules for the View Content conversions for each of the relevant pages on your website.
Another way to do it is by using event parameters, such as content_category, content_ids, or content_type. In this case, you’ll need to set up a product catalog, but the advantage is that every product you add to a specific category will be automatically added and fire the relevant custom conversion.
After setting up these custom conversions, you can segment your website visitors and create custom audiences for retargeting. Afterward, you’ll be able to create lookalike audiences for acquisition based on these custom audiences.
This way you’ll be able to target fish lovers with ads that are relevant for them and bird fans with ads that will be especially attractive for them.
A very general example that can apply to many types of businesses is tracking “big spenders”.
Let’s say you have an online eCommerce store, and you set up a Purchase event. It may be that not every purchase on your store has the same value for your business. Some customers may buy more products or more expensive products than others.
This is why it’s essential to customize your Purchase events using the value parameter to identify people who made especially big purchases on your website.
Pro Tip: You can also add a conversion value to your custom conversion. This will help you track your ROAS in case your conversion does not have a clear monetary value. That can also be a very helpful feature in case you’re a SaaS company, and you provide a free trial. Then you’re going to give your subscription a certain monetary value, even though it’s free.
The next level of customization is Meta pixel custom events.
These events are necessary when you have important steps of the funnel that are not included in the standard ones. Every step of your funnel should trigger a pixel event.
For example, if you have a questionnaire, your pixel should fire an event for each step of the form.
In order to create such events, you have to add the relevant Javascript code to the relevant page on your website.
While custom conversions are tied to a URL, custom events can also be called when a visitor performs an action like clicking a button.
Pro Tip: Don’t create custom events that are meant to replace standard pixel events. If Facebook has already created a standard event, such as Purchase, for example, use it when the event is a purchase. Facebook knows best how to find people who are likely to purchase and will optimize your ads for this type of conversion if you set it up correctly. However, if you create a custom event in order to replace this standard event, Facebook won’t be able to optimize for it properly, and you might miss out on potential customers.
All of these Meta pixel events are great and very helpful when it comes to tracking actions people take on your website.
But what if, in addition to your eCommerce store, you also have a store “in the real world”?
How can you track the effect your online advertising has on sales in your “real-world” store?
Have no fear, Facebook offline events are here!
Tracking your offline conversions will allow you to get a full view of your ad performance and also let you create custom and lookalike audiences based on visitors to your “real-world” store.
Efficiently monitoring offline events is essential for implementing a successful omnichannel marketing strategy.
Read another one of our articles if you wish to learn how to set up offline events.
In conclusion, tracking conversions using Meta pixel events lets you discover hidden opportunities to optimize your conversions.
As there are many standard events and customization options available, it’s important to know which ones to track and where on your website, you should track them.
Meta pixel event tracking will make the process of audience segmentation a whole lot easier and let you reach out to them based on their level of interest in your product or service.
This will also allow you to create powerful lookalike audiences that will drive more conversions.
So, make sure you set up your events wisely.
*Contributed to this article: Pooja H.
After the iOS 14.5 update, the Meta Pixel alone can no longer give you all the data you need to make effective scaling decisions. Solution? Get accurate performance data with Madgicx Cloud Tracking (MCT).

Yuval is the Head of Content at Madgicx. He is in charge of the Madgicx blog, the company's SEO strategy, and all its textual content.


