

Think Your Ad Strategy Still Works in 2023?
Get the most comprehensive guide to building the exact workflow we use to drive kickass ROAS for our customers.


And with paid ads in particular, the ability to know what is performing well and what isn’t will be the deciding factor in whether you’re making money or tossing it into a bonfire.
After all, your hard-earned money goes into Google Ads, and you deserve to know what you're getting in return.
In this guide, we’ll show you how to set up Google Ads conversion tracking on your Shopify store in two different ways. We’ll also cover how to troubleshoot any issues you may run into and 3 ways you can leverage your newfound data to improve your conversions and skyrocket your revenue.
Let's hop to it!
While it may seem like a little piece of magic, the process for tracking conversions is quite simple:
Pretty cool, right?
If that wasn’t enough, Google utilizes your conversion data to boost your ads' performance. Without this crucial data, Google can't refine and improve your ads, possibly leading to a less effective advertising campaign (which, in 2023, is a proverbial stake in the heart).
On top of all the benefits, conversion tracking is easy to set up and is completely free. At the end of the day, there’s no reason not to use it, and every reason you should.
Now that we know what conversion tracking is and what it can do for us let’s get onto the good part—getting it up and running!
There are two main ways to set up Google Ads conversion tracking: using the Google & YouTube app or inserting the code on your Shopify site manually. We’ll cover both options in this section.
This is by far the easiest method. However, you do need to meet a few requirements before you use this method:
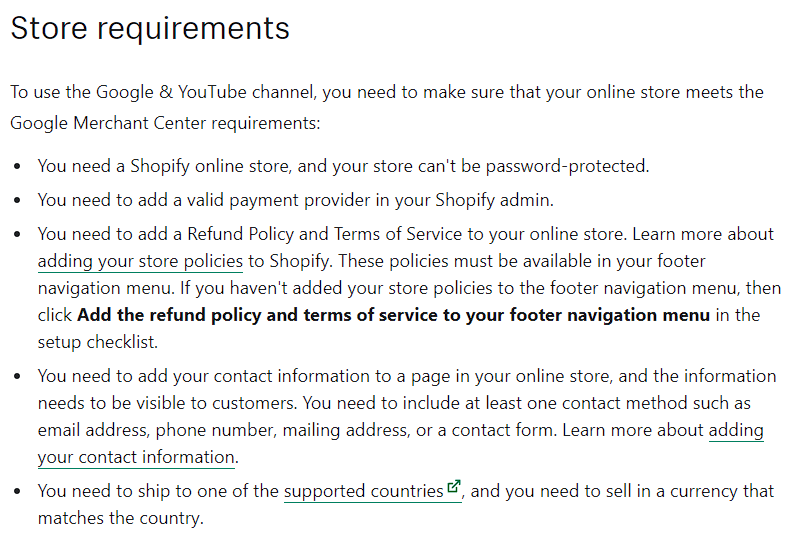
You also need to have a Google Merchant Center account, which is free and only takes a few seconds to sign up for.
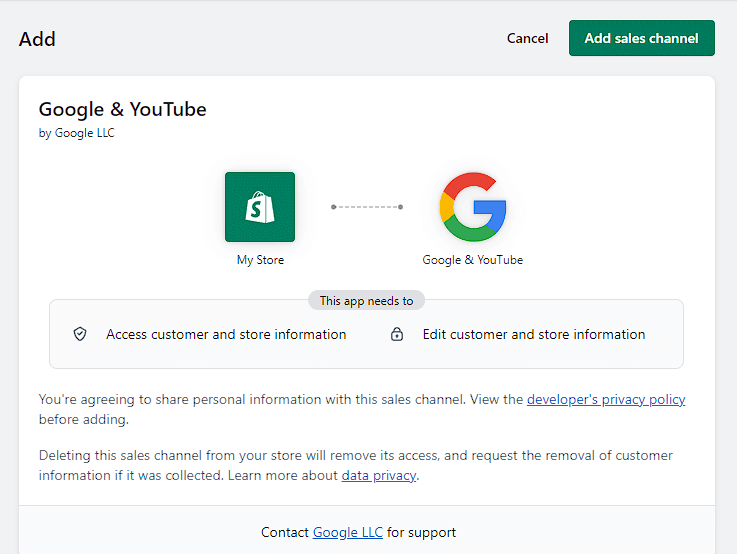
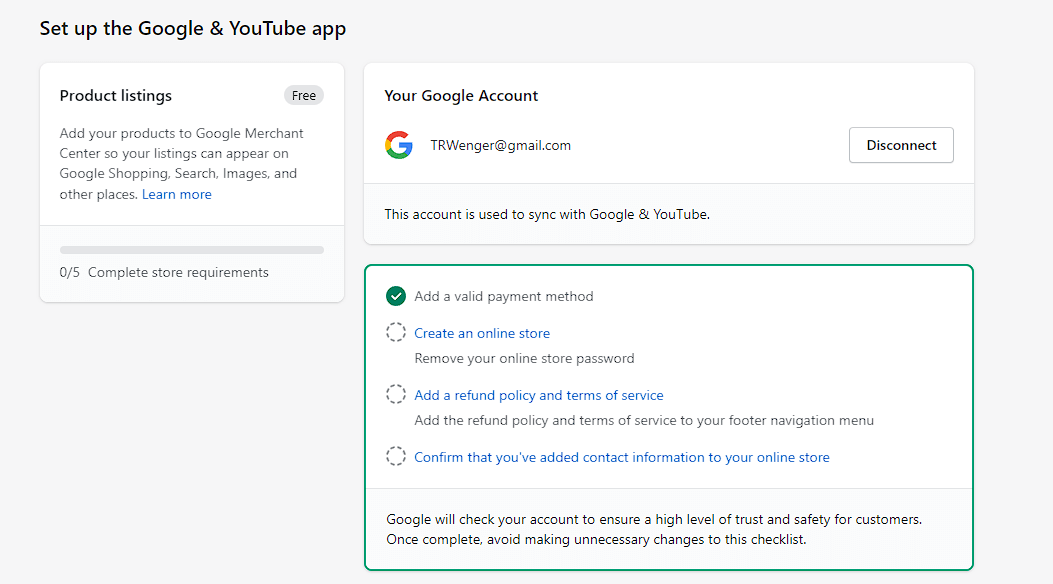
Once you have all those items completed, you can finish the setup on Shopify using these steps:

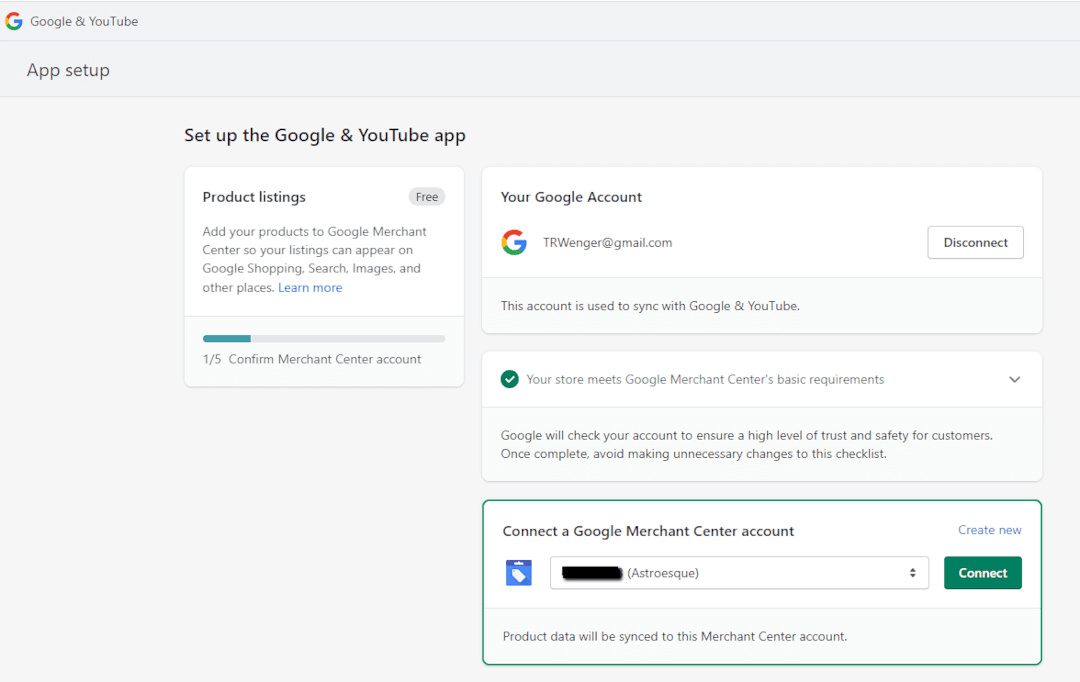
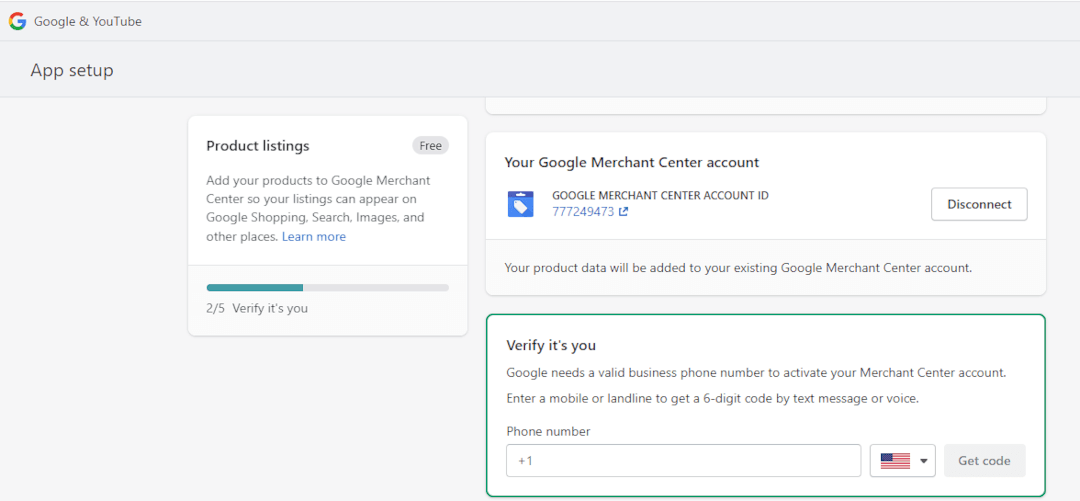
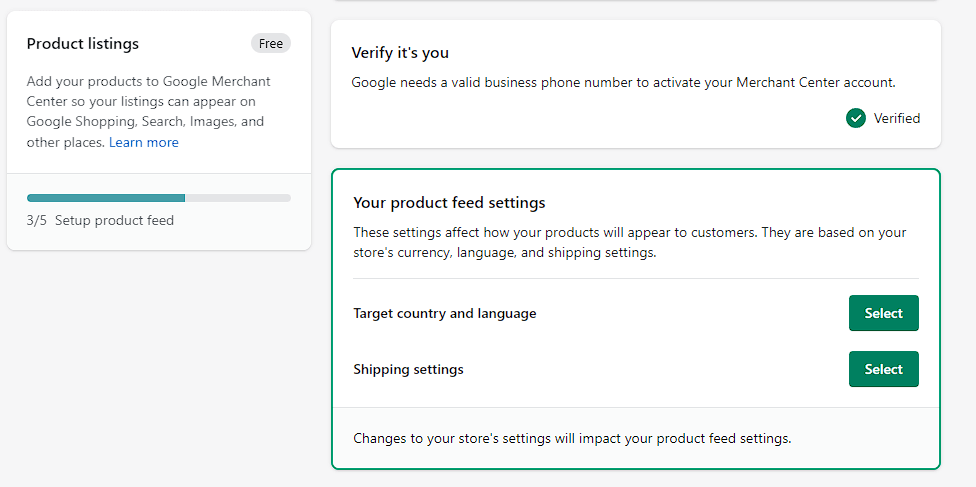
It might take the system up to an hour for all your products to sync to the Google Merchant Center, but you can rest assured that all your tracking is set up and ready to go!
As we mentioned before, this route is a bit more complicated. If you’re not experienced in editing code, you might want to get some help from your developer to set it up in this fashion.
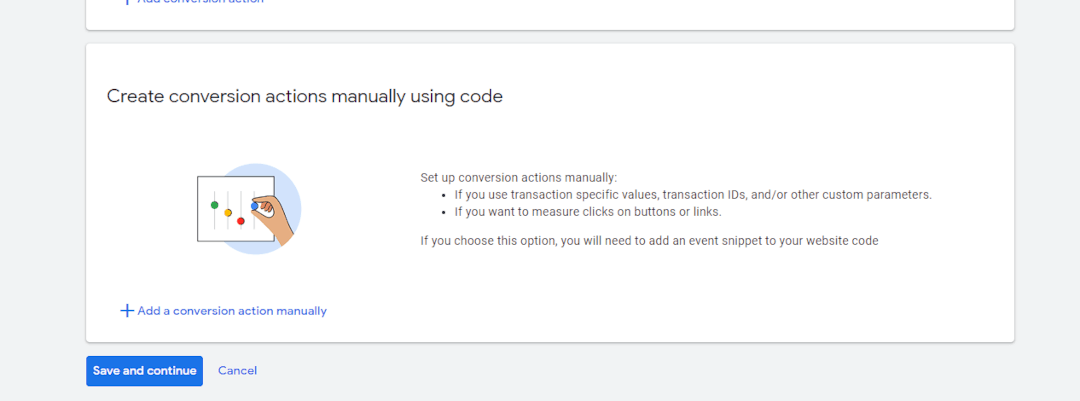
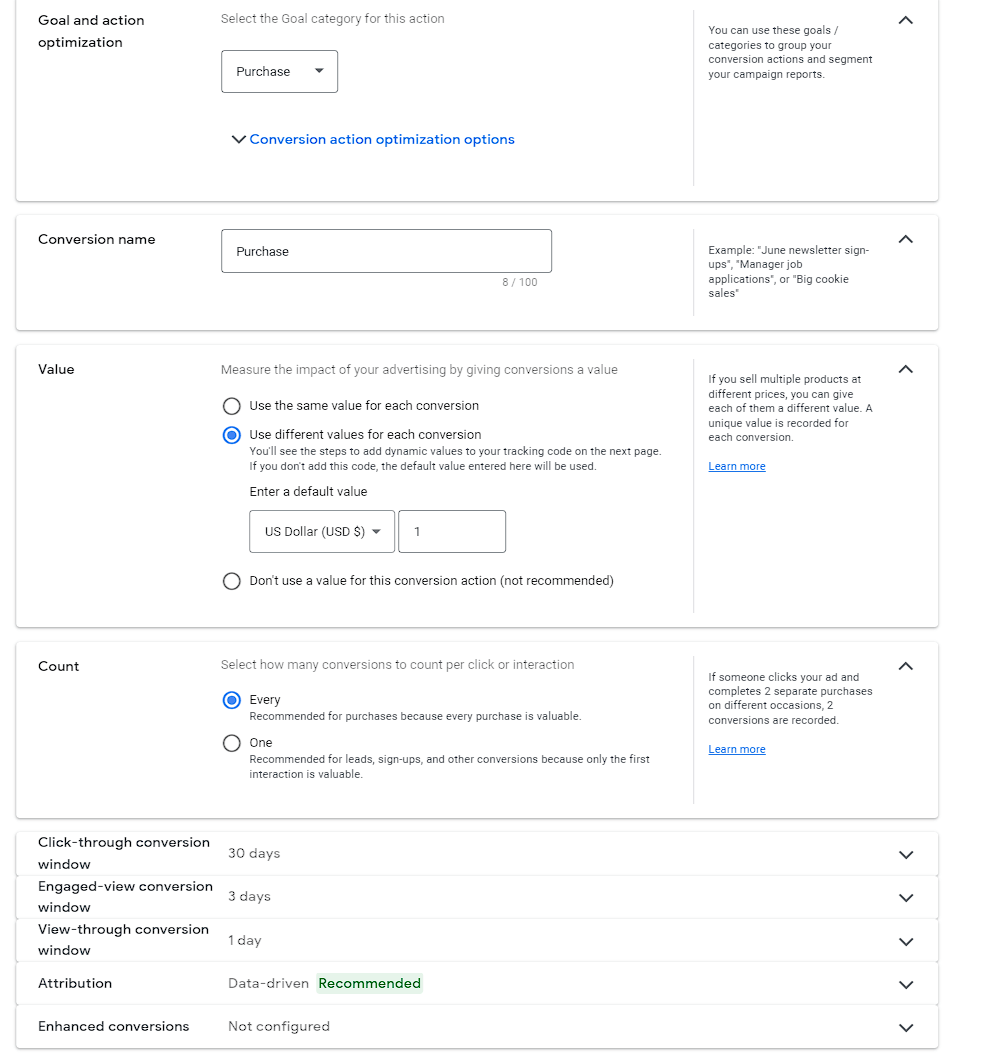
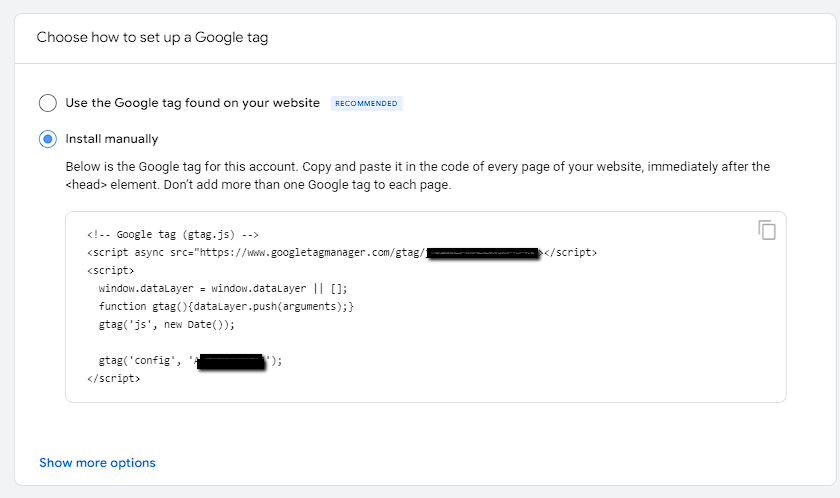
Instead of the app doing all the work as before, we’ll need to manually create the conversion action, install the global site tag, and then add the event snippet to where we want the action tracked (in this case, we’ll be tracking purchases).
We’ll also need to edit the pre-defined event snippets to make sure they dynamically add in the revenue we’re generating from each purchase.


Now, we can move on to the very last step of the process - adding the event snippet to checkout.
This last step is a little tricky, as it involves editing the snippet of code we get from Google before we place it into Shopify.

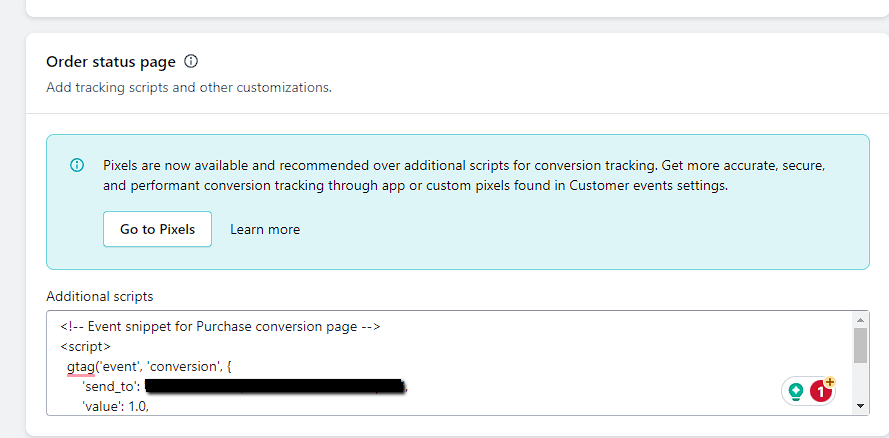
9. At the end of these steps, you should have a code that looks something like this (but with your Google code where ‘1234567’ is):
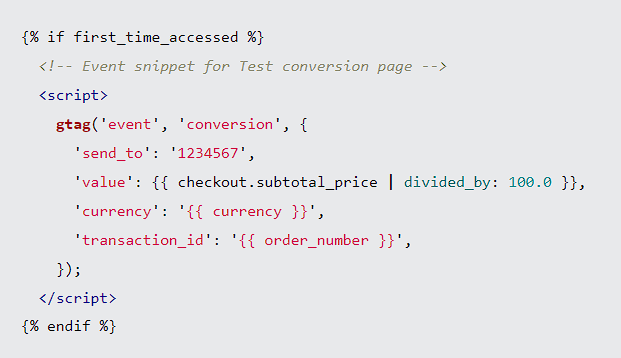
Congratulations, all your tracking is now set up and ready to go! Note that it may take a few hours for all of this to sync in the backend and for actions to appear.
The very first thing you should do after setting up the conversion actions is to test them and make sure they’re working properly. As we just mentioned, it might take some time for this information to sync, so I usually like to give it about an hour before I do these tests.
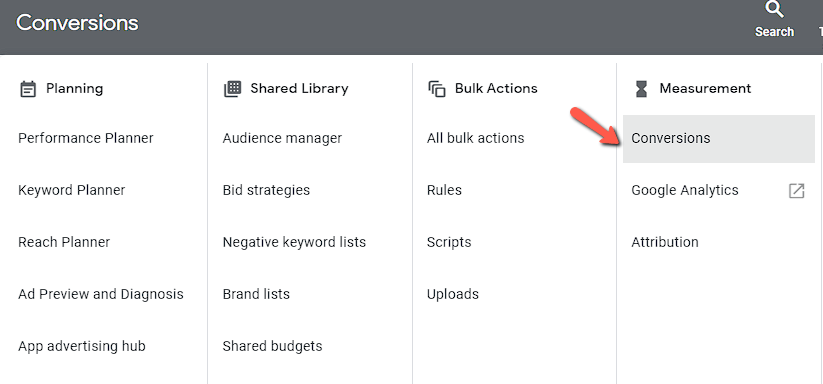
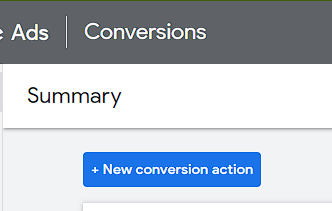
The easiest way to do it is to simply buy one of your own items and see if it shows up. Complete the full purchase process for one of the items in your store, and then head over to Google Ad Manager. Select the Conversions option under the Measurement tab, just like we did before.
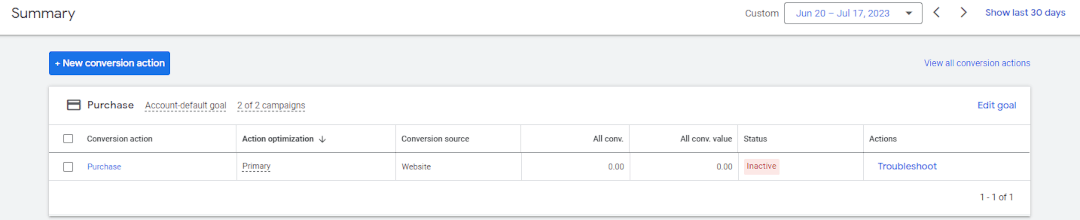
Look for the conversion that we created earlier. If everything is set up correctly, you should see the status as active and the number of conversions and conversion value here.
Troubleshooting common issues with Google Ads conversion tracking
As the adage goes, we all make mistakes—that’s why pencils come with erasers. Here are a couple of common issues you might run into with your conversion tracking and how you can fix them ASAP.
If you’re not seeing any conversion data, chances are there’s something wrong with the setup and implementation of the previous steps. The easiest way to check this is to use Google’s Tag Assistant tool.
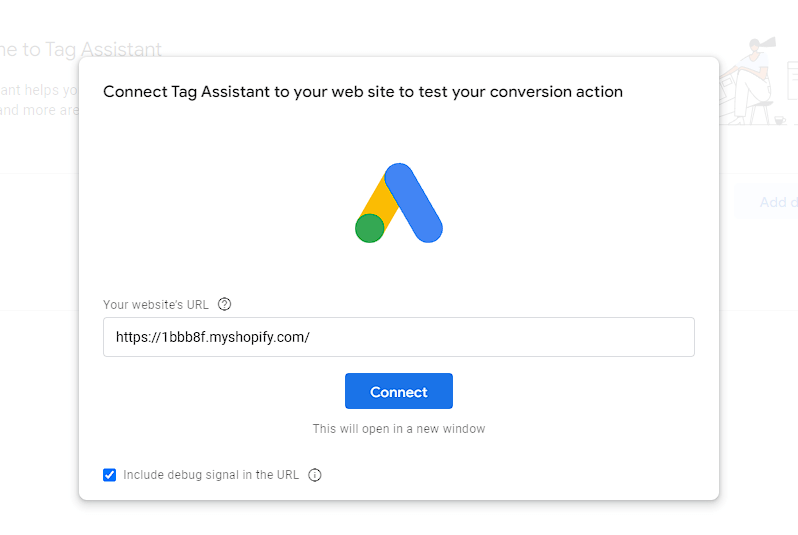
Once you enter your domain, Google will open a debugging window with your website. From there, just take the action you’re trying to test (in this case, make a test purchase). Once you complete this action, you’ll be able to see if the conversions are working. If not, go through the install steps again and repeat the process.
If you’re seeing the conversion values are off and you installed the code manually above, make sure to check the currency part of the code. You can set it manually (for example, setting it to USD) or have it use the currency in your Shopify account by using the currency placeholder '{{ currency }}'.
Make sure to also check that your Shopify store currency has been set to the right denomination, as this will have a huge impact as well.
If you see a delay in your conversion reporting, know that it’s normal. In fact, it can take up to 24 hours for conversions to show up in Google Ads. If you’re seeing that conversions are not appearing and it’s been longer than 24 hours, use the steps above to troubleshoot the connection between the platforms.
Now that you have the conversion data inside your account, it’s time to actually do something with it. Let’s take a quick peek at 3 ways you can use your new conversion data to improve your Google Ads campaigns.
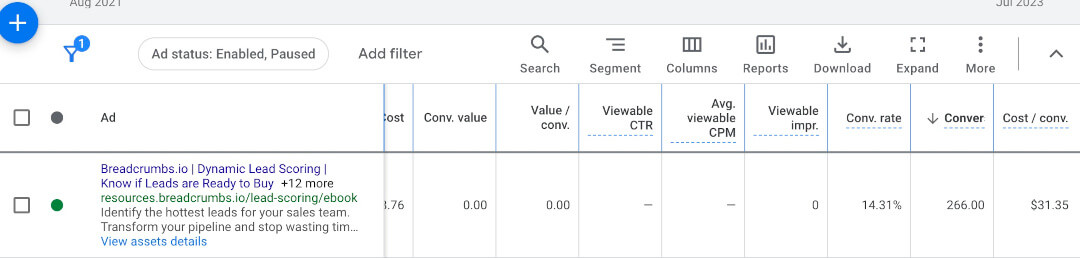
The first place to start is by simply checking out how many conversions (and how much revenue) you’re earning. Log into Google Ads and view your campaign data (either campaign, ad group, or ad level).
You can now see all your conversions, your conversion rate, and your cost per conversion inside these tables.
Based on the treasure trove of data you have now, you can make strategic decisions to adjust your campaign bids and budgets based on performance. Here's how you can do this:
Adjusting your budget is also crucial. If a campaign is performing well and leading to profitable conversions, you might consider increasing the budget to reach a larger audience.
On the other hand, if a campaign is underperforming, you might want to reduce its budget and allocate more to the successful ones.
The best part of all the tracking? We can now narrow down on those pesky keywords and see what’s really driving results for our ads.
For keywords, go to the 'Keywords' tab in your campaign or ad group. Look at the 'Conversions' column to see which keywords are driving the most conversions. High-converting keywords should be given more budget or higher bids.

For ads, go to the 'Ads & Extensions' tab. You can see how each of your ads performs in terms of clicks, impressions, click-through rate (CTR), and conversions.
By focusing on high-performing keywords and ad text, you can create more effective campaigns that increase your conversions and ROI.
Effectively tracking conversions on Google Ads isn't just a best practice—it's a fundamental step to growing your Shopify store with successful advertising.
By gaining clear insights into which ads are driving sales, you can allocate your budget more efficiently, making each dollar work harder for your business.
Remember, the journey doesn't stop at simply tracking conversions. Continual monitoring and optimization of your Google Ads campaigns are vital, given how fast marketing and shopping trends change. Every piece of data is an opportunity for improvement, a chance to refine your approach, and a step closer to your ultimate goal: running a successful eCommerce store.
Embrace conversion tracking as your secret weapon in eCommerce success, and keep striving for a smarter, data-driven strategy that puts your business on the path of exponential growth.
So you got your Google Ads conversion tracking right, but what about Facebook? Embrace Madgicx Cloud Tracking—your ultimate solution that delivers precise performance data straight into your Meta Ads Manager. No more costly trial and error, only accurate tracking. Plus, we’ll have you set up in just 2 days!

Tory Wenger is a marketing operations whiz with 10+ years of experience mastering CRM optimization, digital marketing, and event strategy. A certified HubSpot, Facebook, and Google expert, her work has been spotlighted on top platforms like Hootsuite, AdEspresso, and Databox. When she’s not crafting winning strategies, you’ll find her gardening or painting in her home in the Florida panhandle.


